The following instructions will guide you on how to connect your woo-commerce store to your TWM Storefront.
Please review each section and step carefully
For additional assistance, please contact onboarding@thewmarektplace.com
- The product should be published on the your Woocommerce store.
- The product should be either “simple” or “variable” product.
- There cannot be more than 3 attributes/options on a product. The system only allows up to 3 options from which you can create different variants.
- The number of variants/variations cannot be more than 100. The System only allows only up to 100 variants.
- The product should not be “downloadable” or “virtual“.
- The product should be “purchasable” (Product should have quantity OR price).

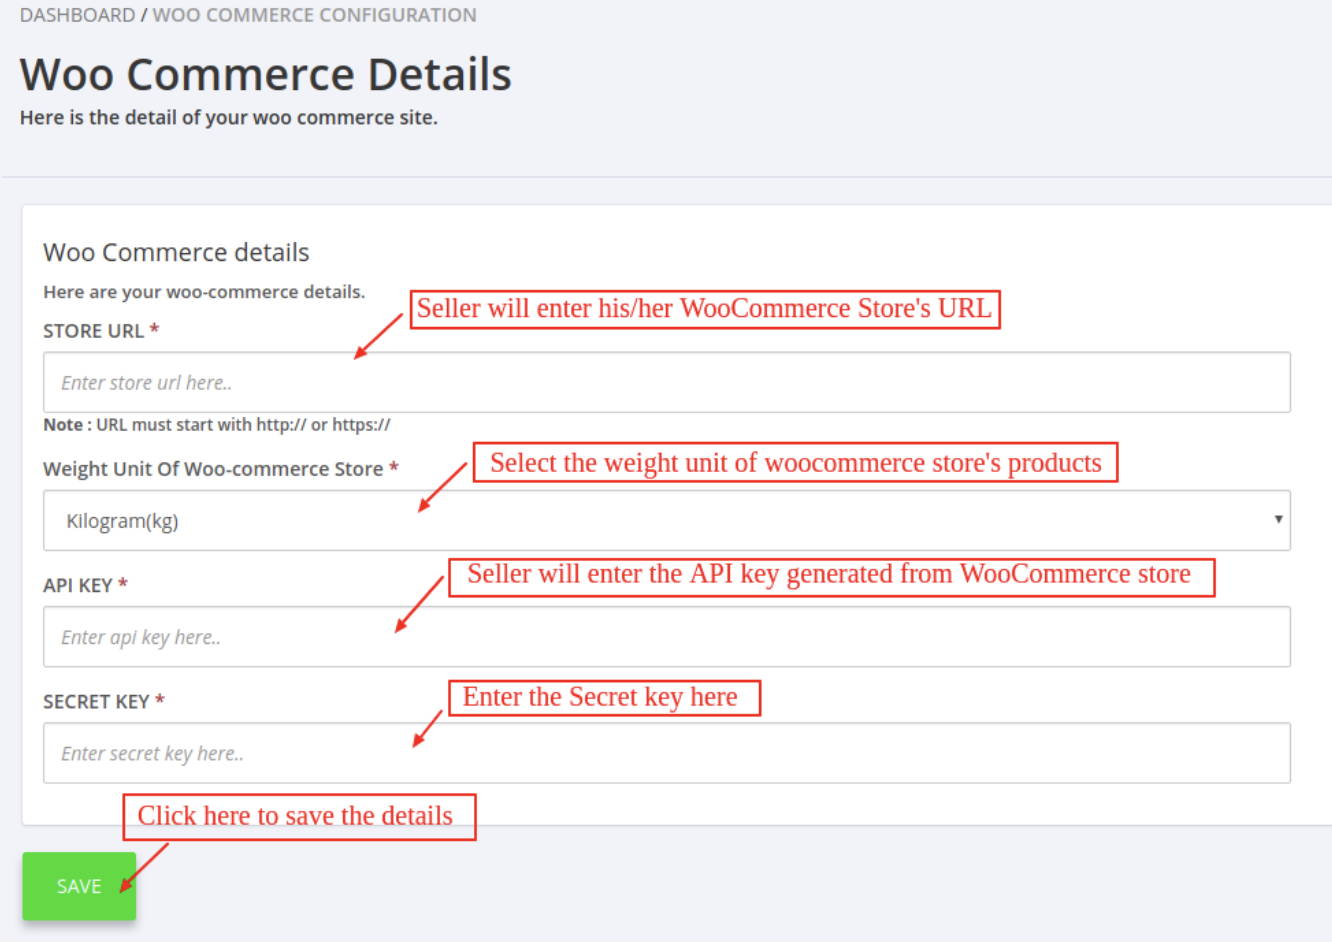
Step#1: Open Woo Commerce Connector in your TWM Dashboard
- Enter your WooCommerce Store URL from where he/she wants to sync the products.
- Select the Weight Unit of WooCommerce Store’s products.
- Enter the API key and Secret key.
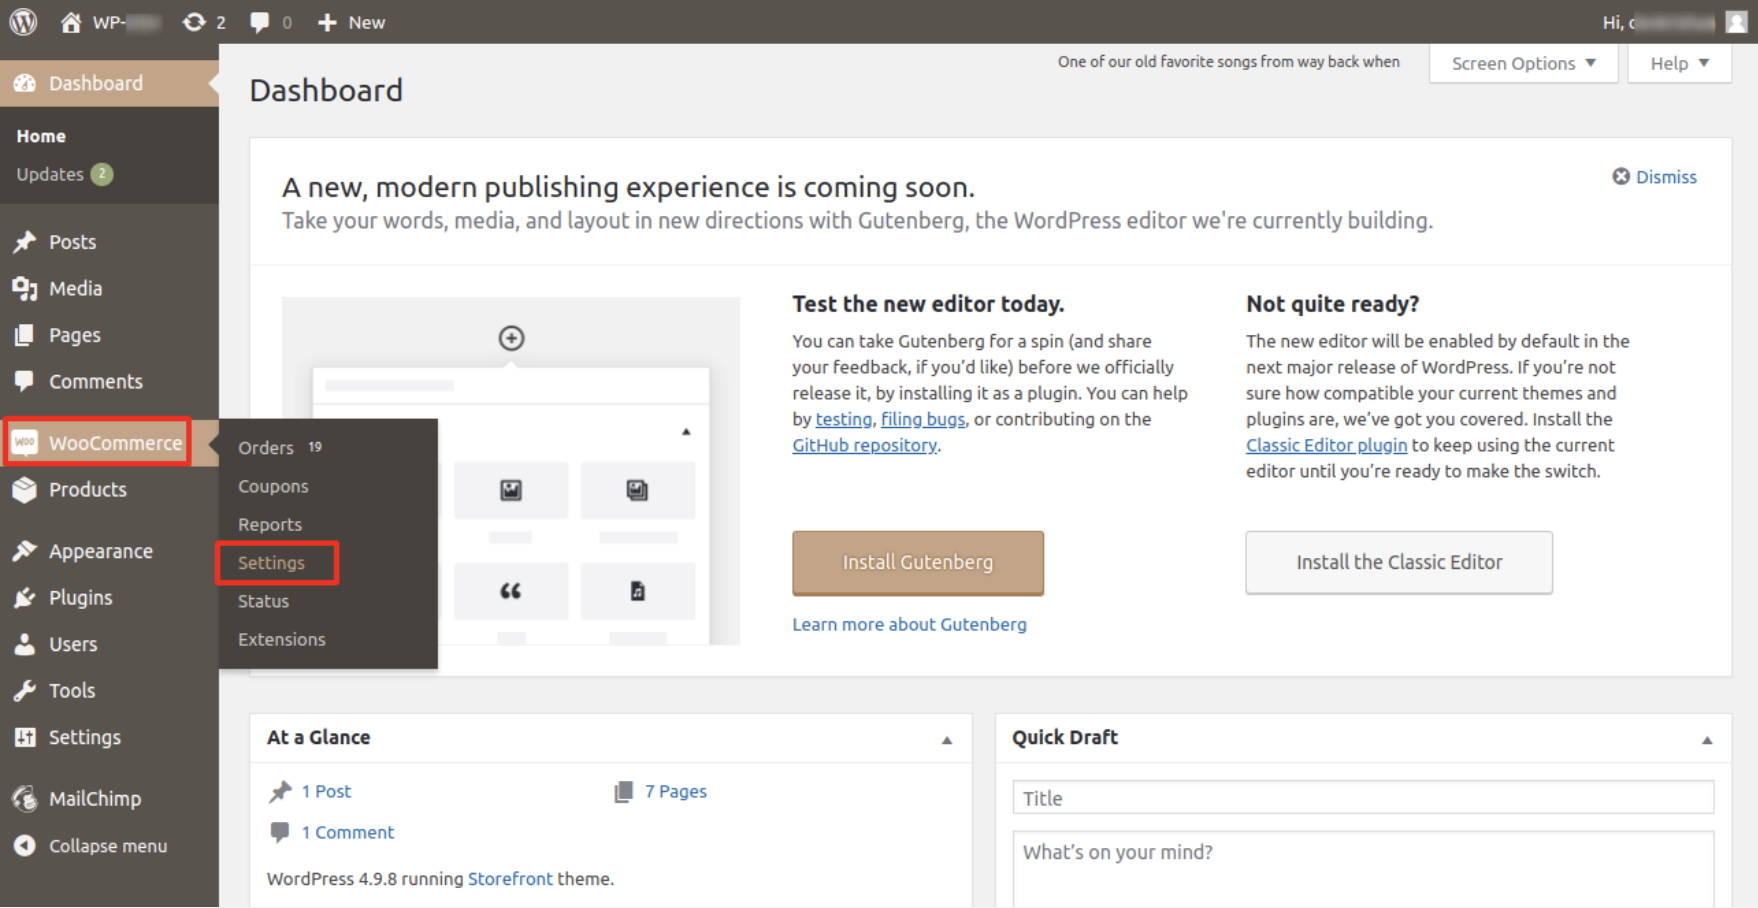
Step#2: Log into your Woo Commerce Account.
- Log into your Word Press site, find the "Woo Commerce" Tab on your account.
- Open up the window
- Click on Settings"
T
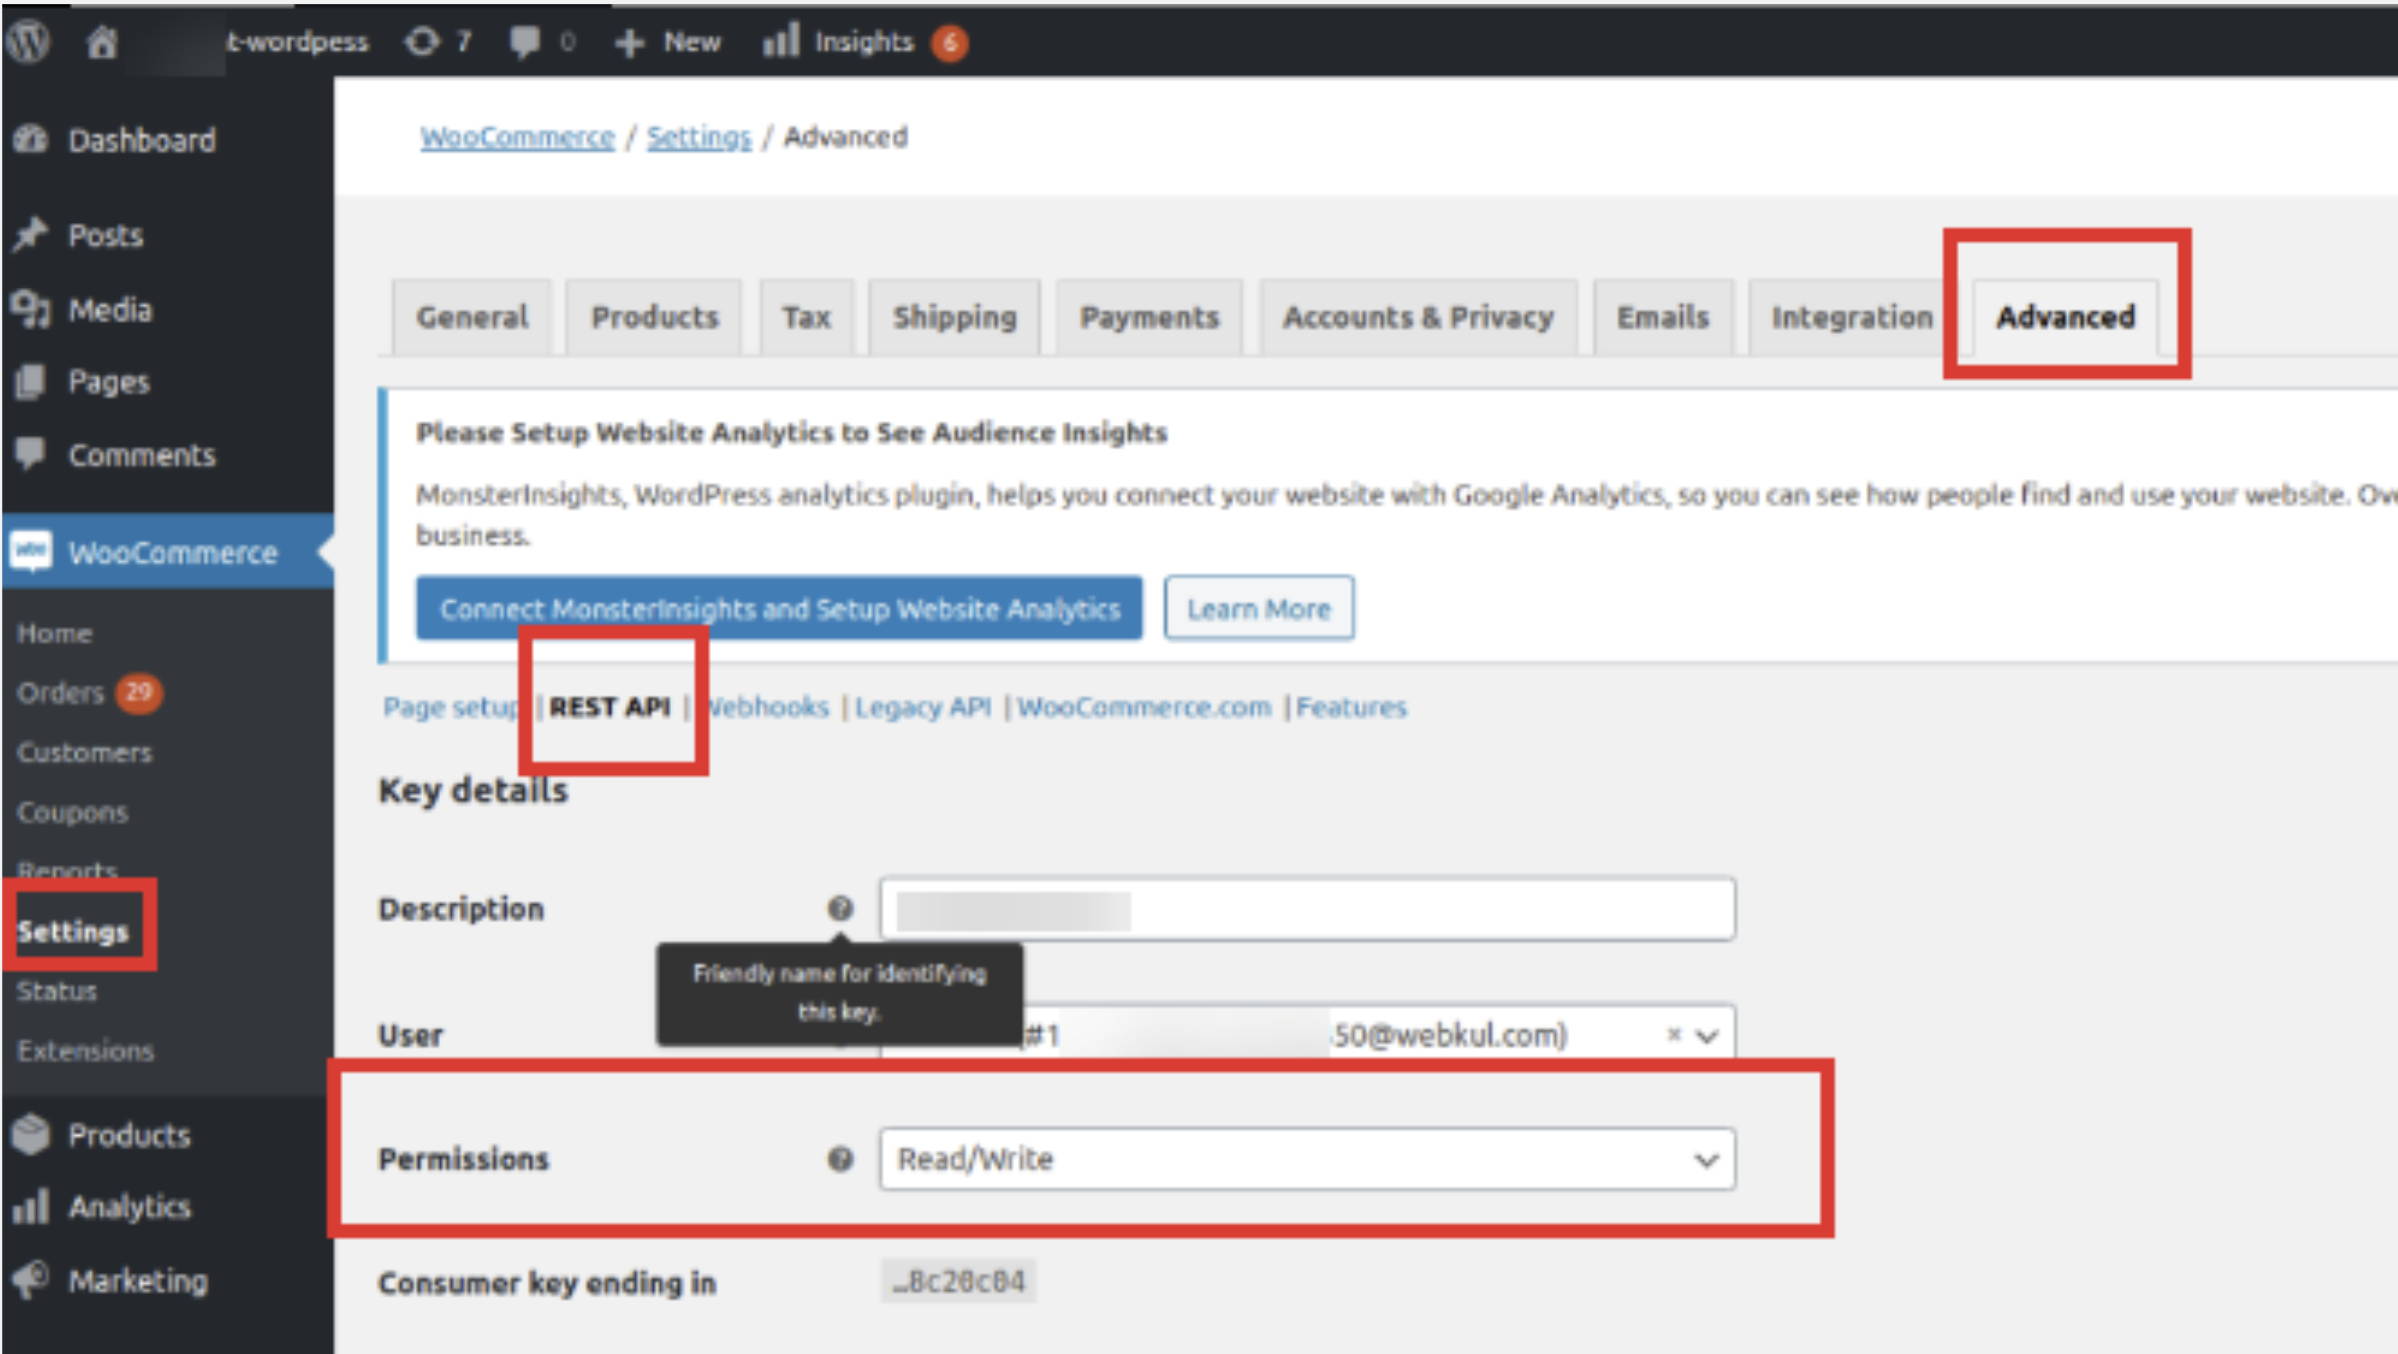
Step#3: Access Advanced Settings
- Login to WordPress
- >>Go to WooCommerce Settings
- >>Advanced
- >>REST API
- >>Add Key
- >>Click on Generate API Key
- >>From here you will get the API Key as well as the Secret key.
RETURN BACK TO YOUR TWM DASHBOARD
Step#4: API & Secret Key
- Input your API Key into the 3rd slot
- Input your Secret Key into the 4th slot
- Hit "Save"
T
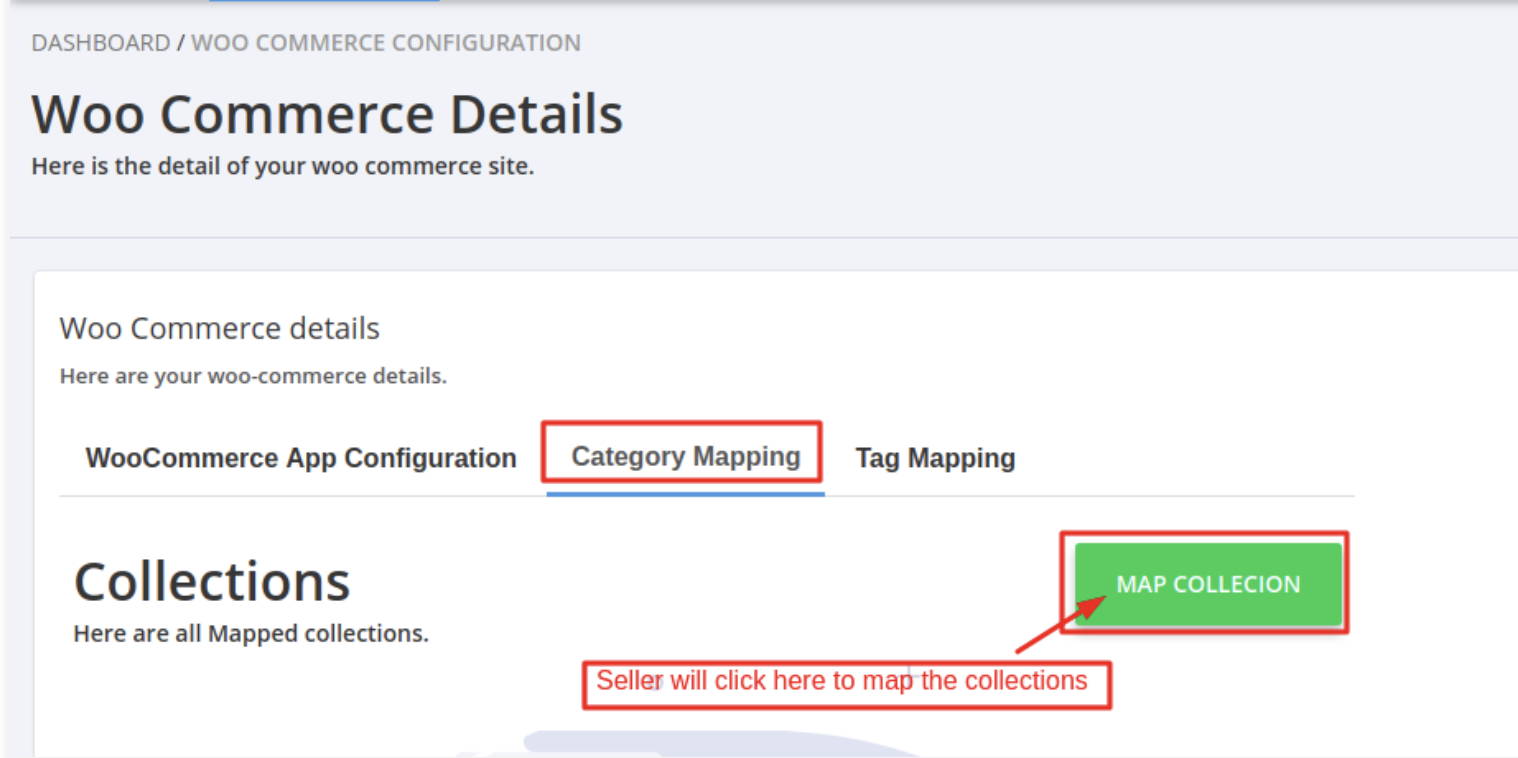
STEP#5: MAPPING
- NOTE:- The category mapping works only for the manual collections, not for the automated collection.
- Click on "Map Collection"
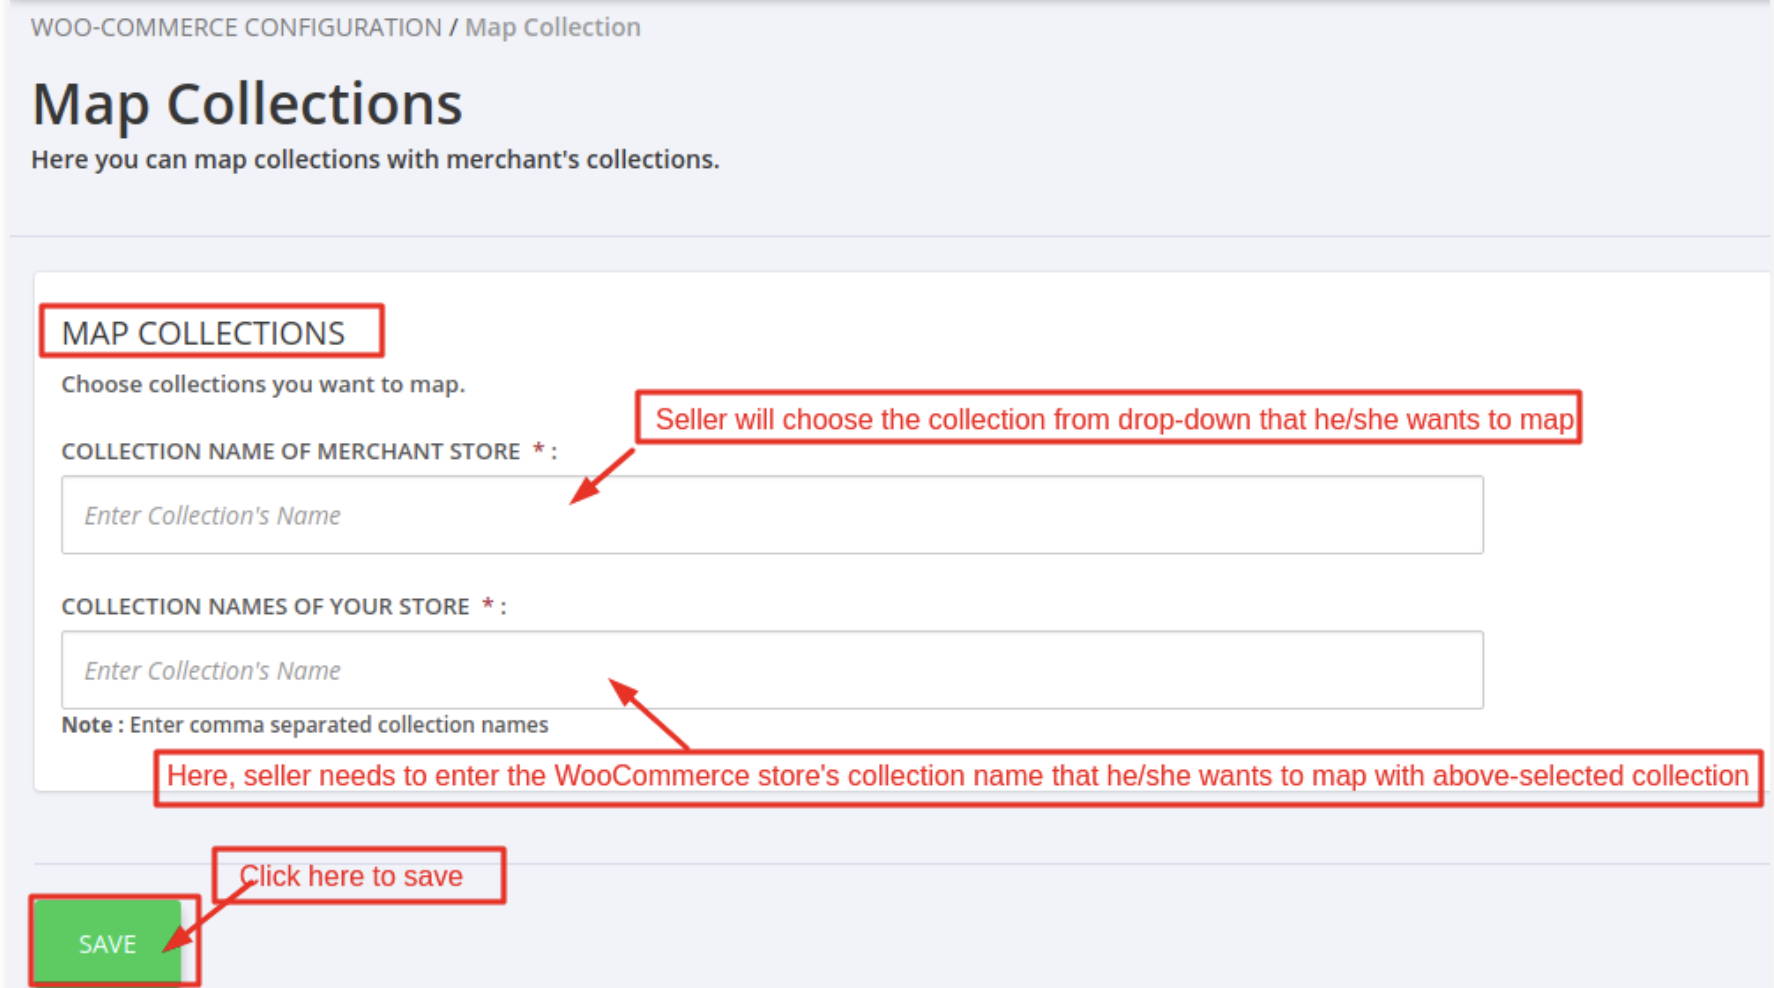
STEP #5: Map Collections
T
STEP#6: MAPPING TAGS
6A: Click on "Map Tags" under the "Tag Mapping" Tab
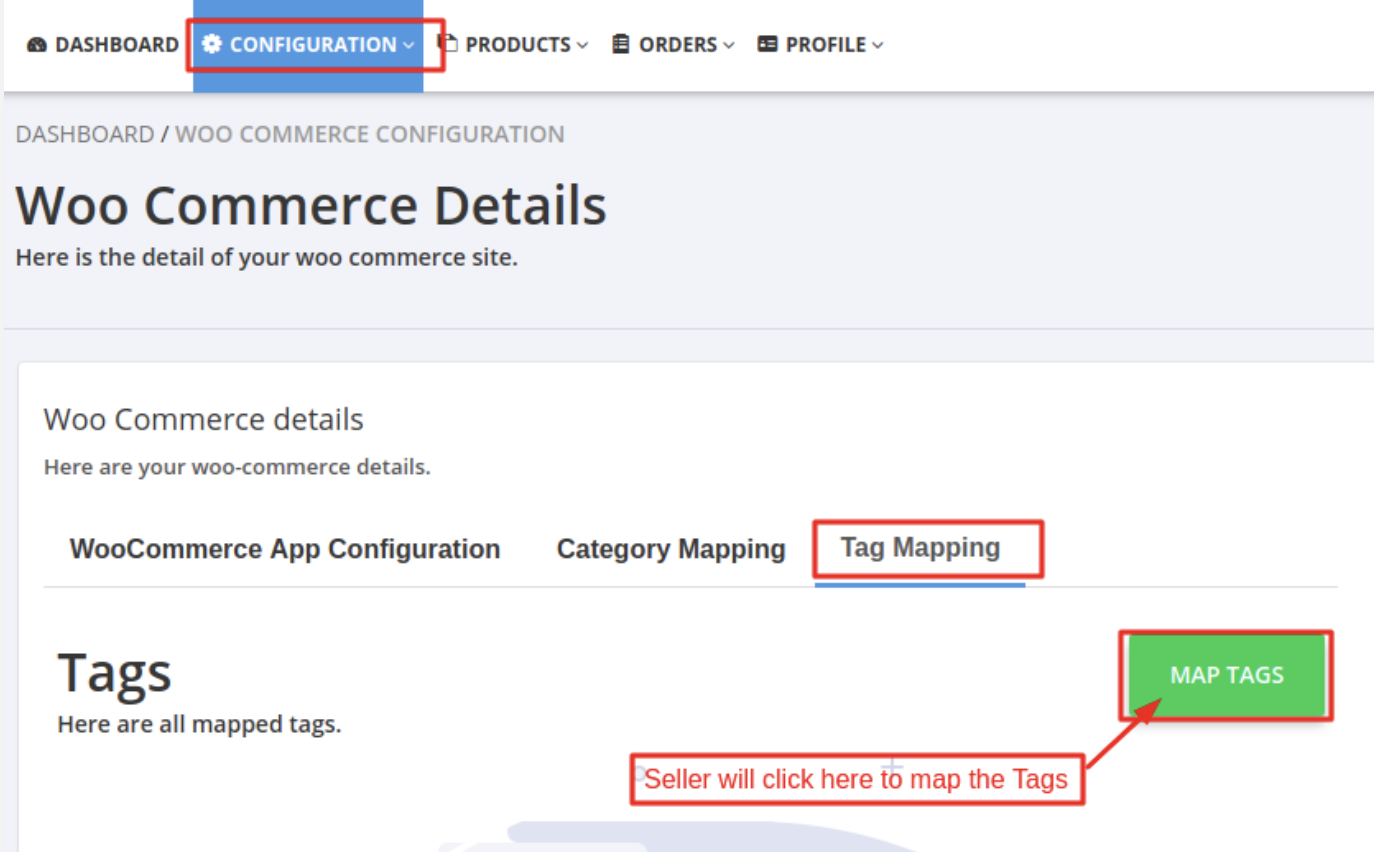
6B: Review the Tags in your Woo Commerce, find matching "Tags" in TWM Portal
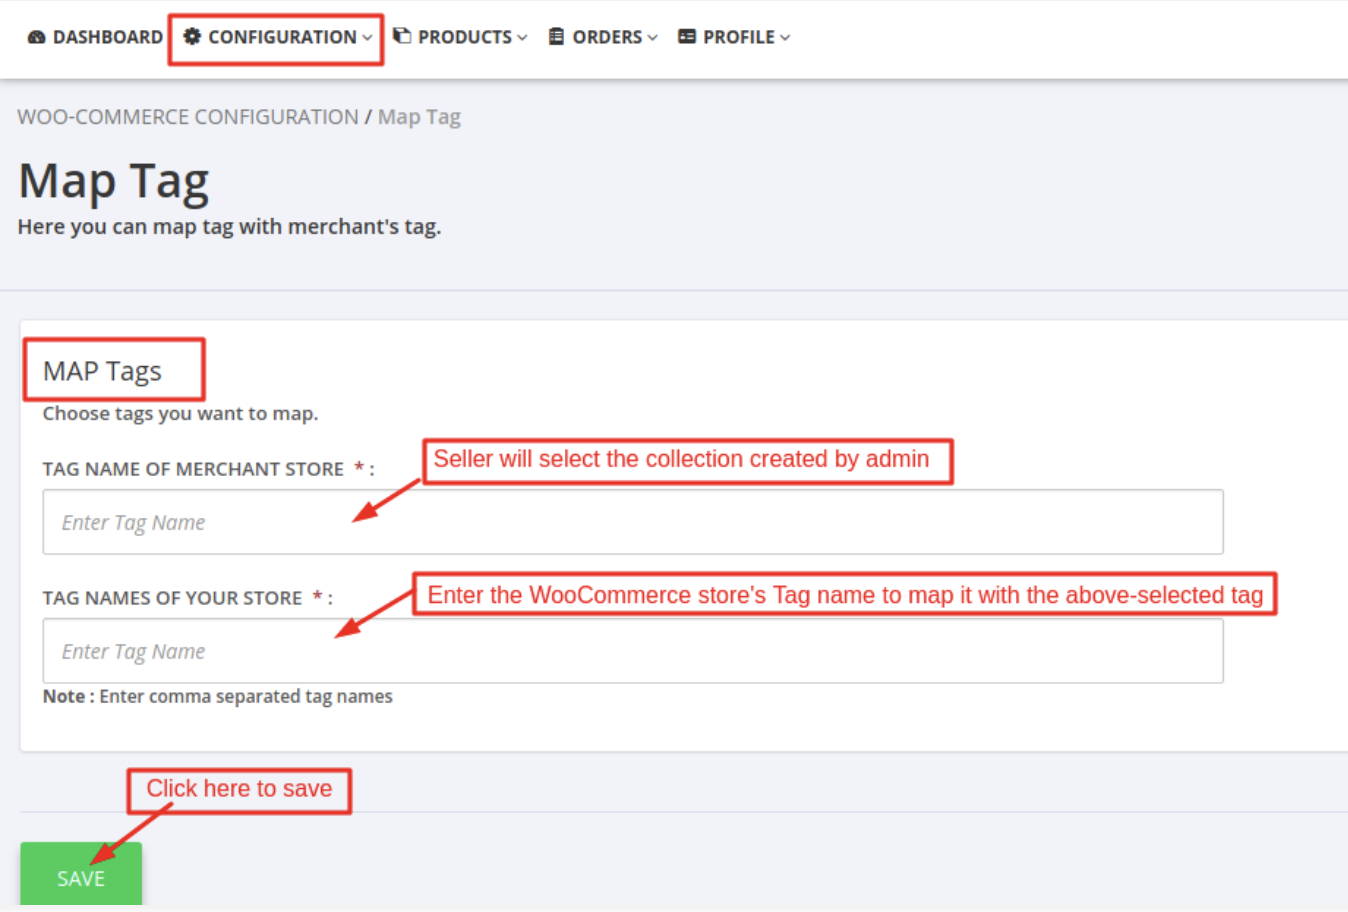
Tips: To make this process easier, make sure your products have Tags inside your Woo Commerce Accounts
This will be a One TWM COLLECTION to Many Woo Commerce Mapping.
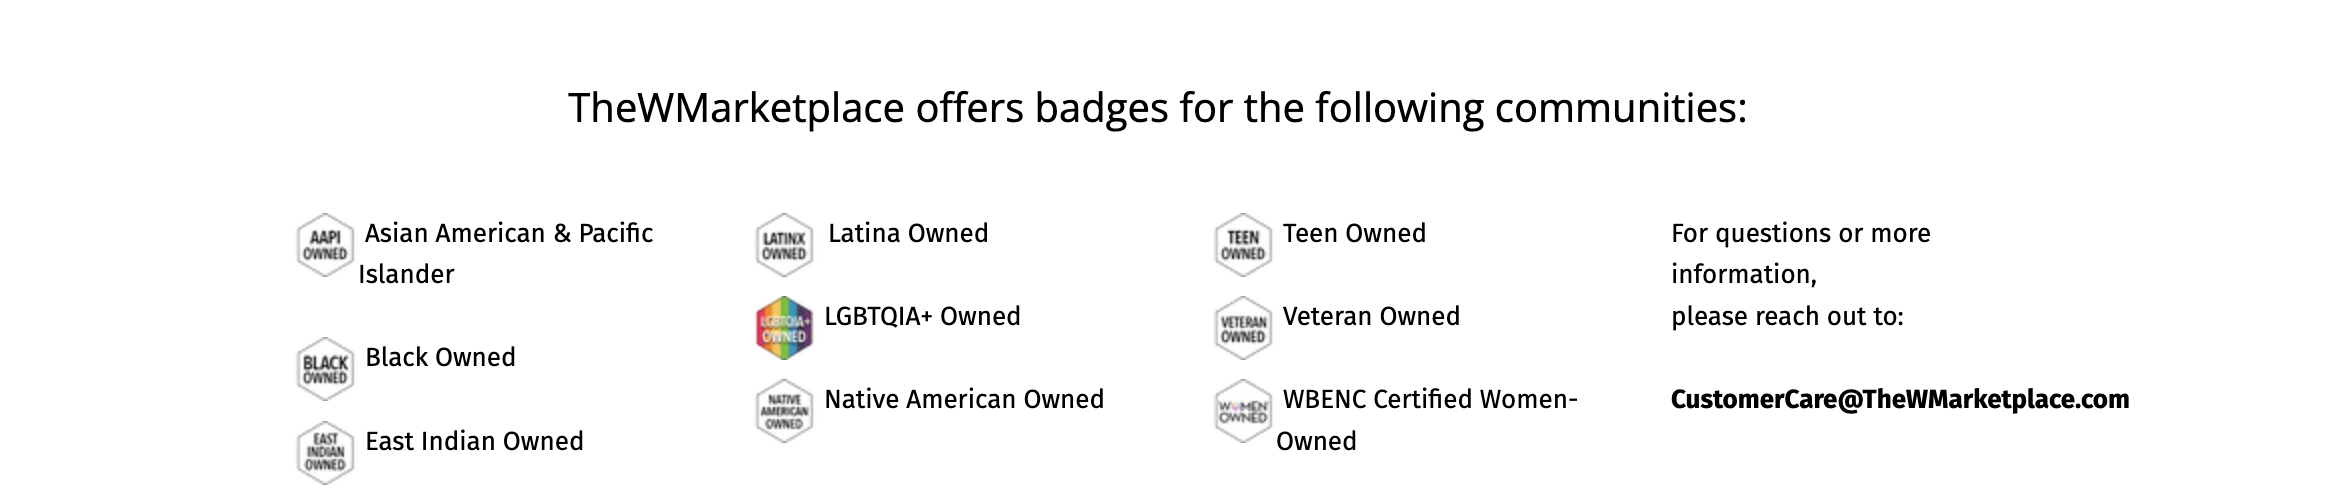
Please ensure you are adding badges to this section that identify with a community.
Please be sure to have the same Tag inside your Woo Commerce account before mapping
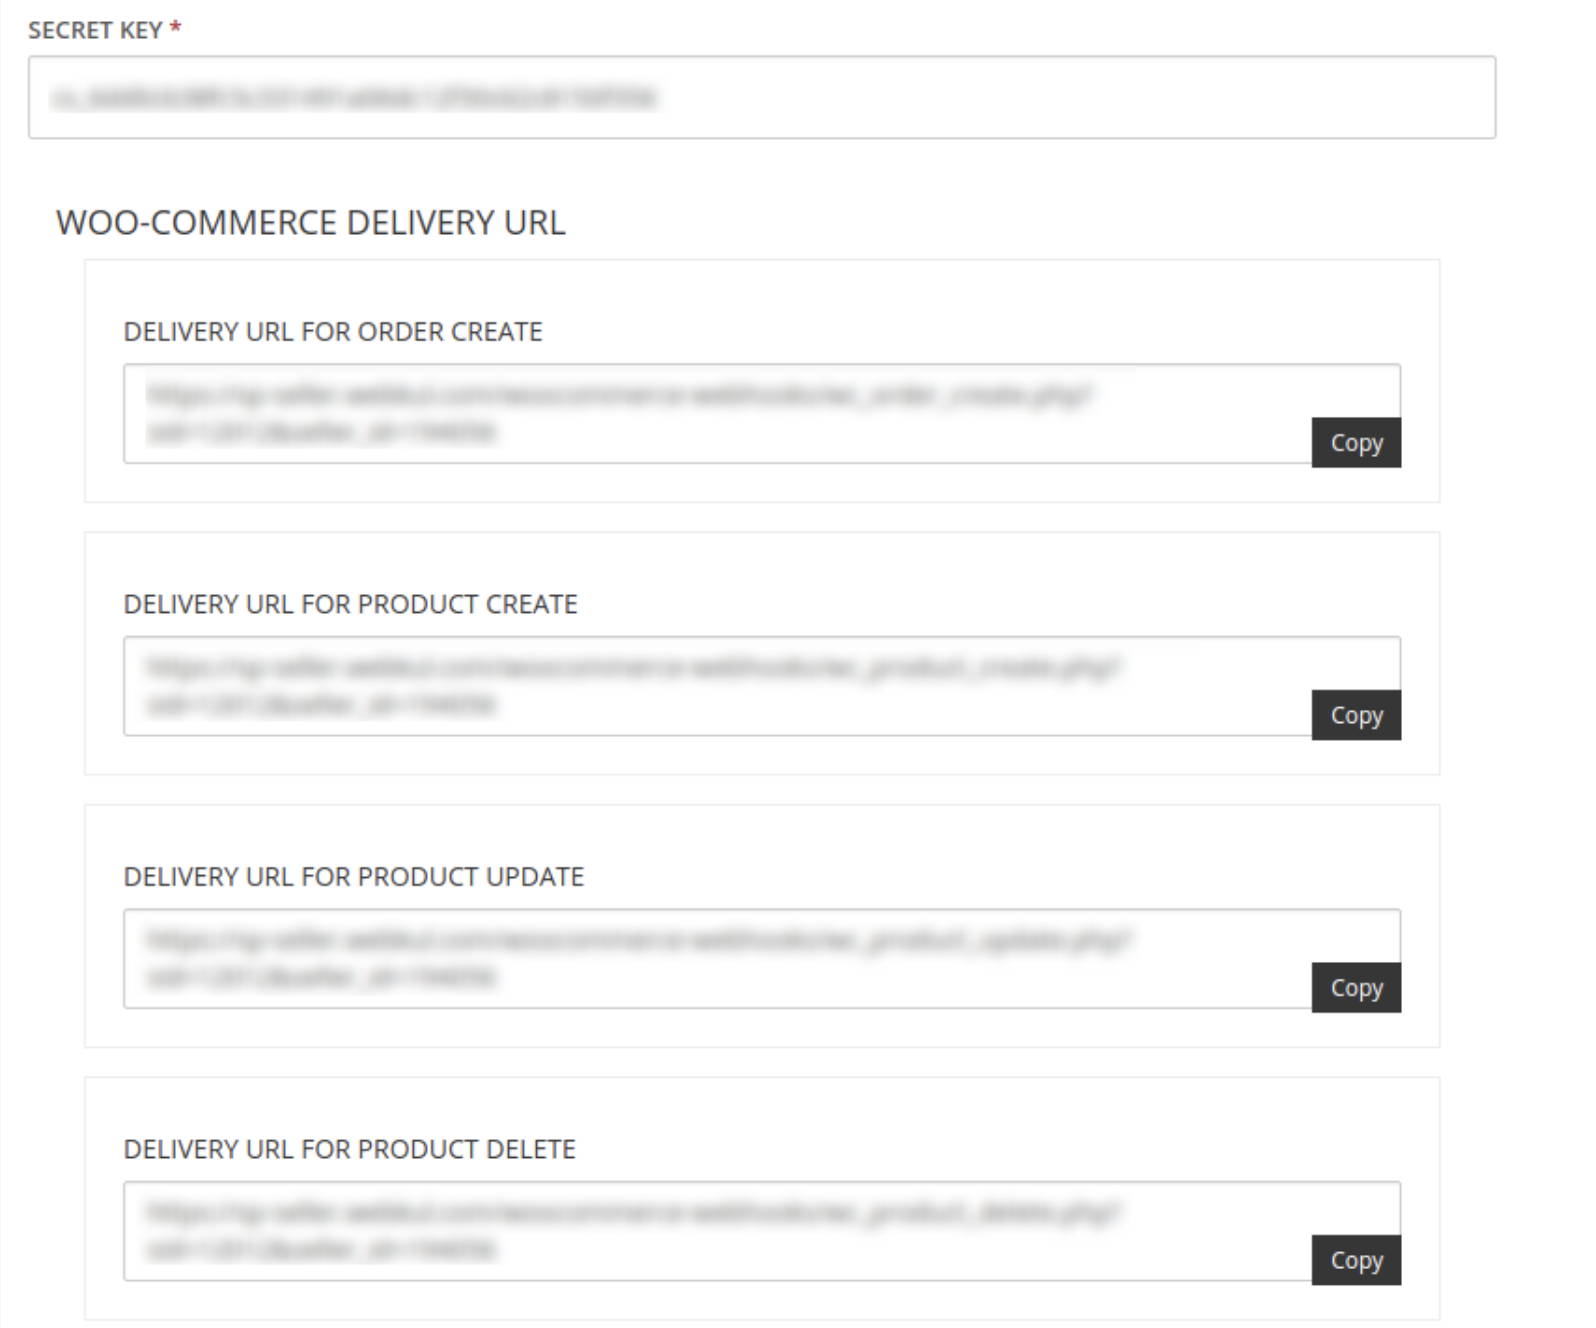
STEP# 7A: Webhooks from TWM to WOO COMMERCE
- Delivery URL for Order Create
- Delivery URL for Product Create
- Delivery URL for Product Update
- Delivery URL for Product Delete

STEP #7B: WEBHOOKS
- >>WooCommerce
- >>Settings
- >>Advanced
- >>Webhooks
- >>Add Webhook
- >>Enter the details
- >>Click on Save Webhook.
T
STEP# 8: Import Products
Method 1. Import Products by choosing a Date Interval.
Seller can select a date range to import the product created in between the selected range.
Method 2. Import Products by Product IDs.
Seller can enter the comma-separated Product IDs and import all of them in one go.
Method 3. Import Products by Product Slug.
Seller can enter the Product’s slug and import that product.

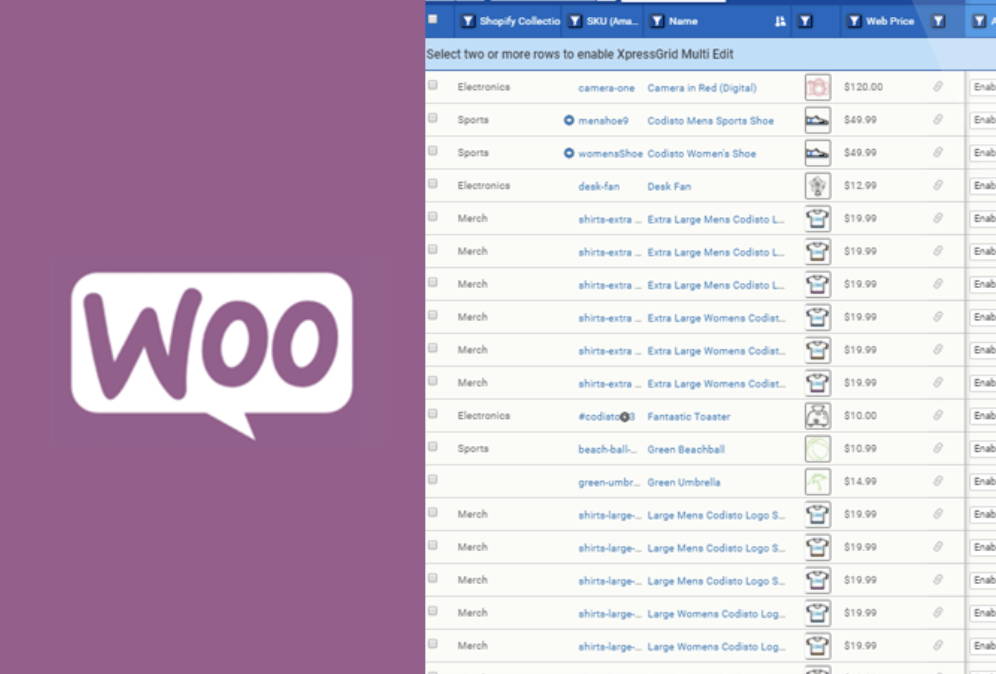
After your products are imported, click on the "Listings" Tab of your dashboard.
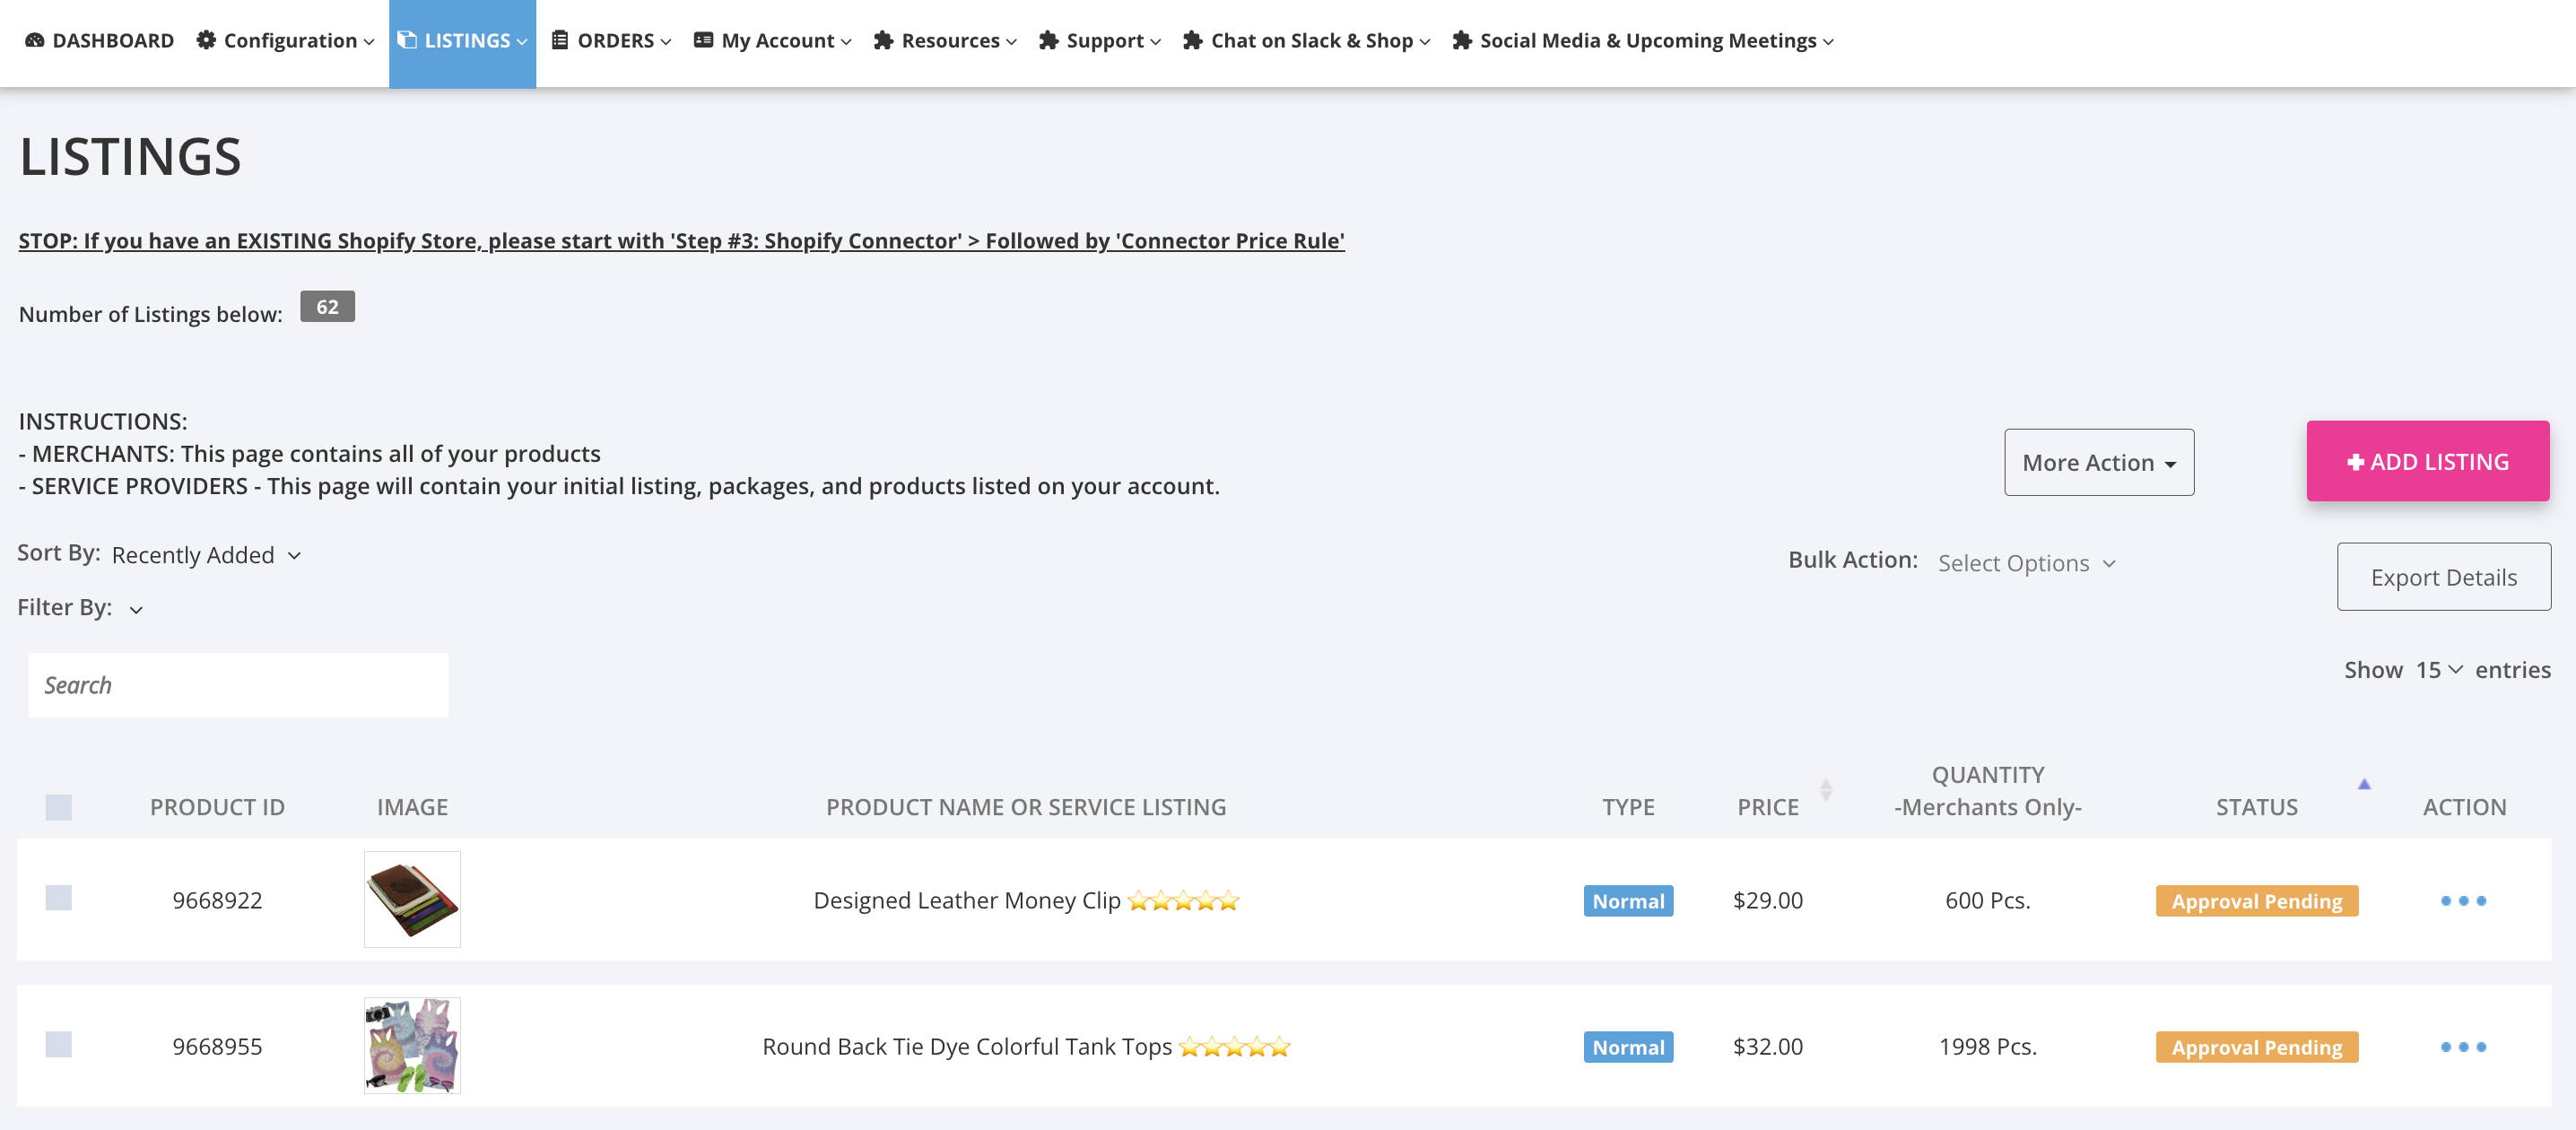
Step #9: Review your listings
- Review your products in detail to ensure all "Tags" and collections are mapped properly
- You can assign a "Type" - this is unique to TWM
- You can sync your product to your connected store.
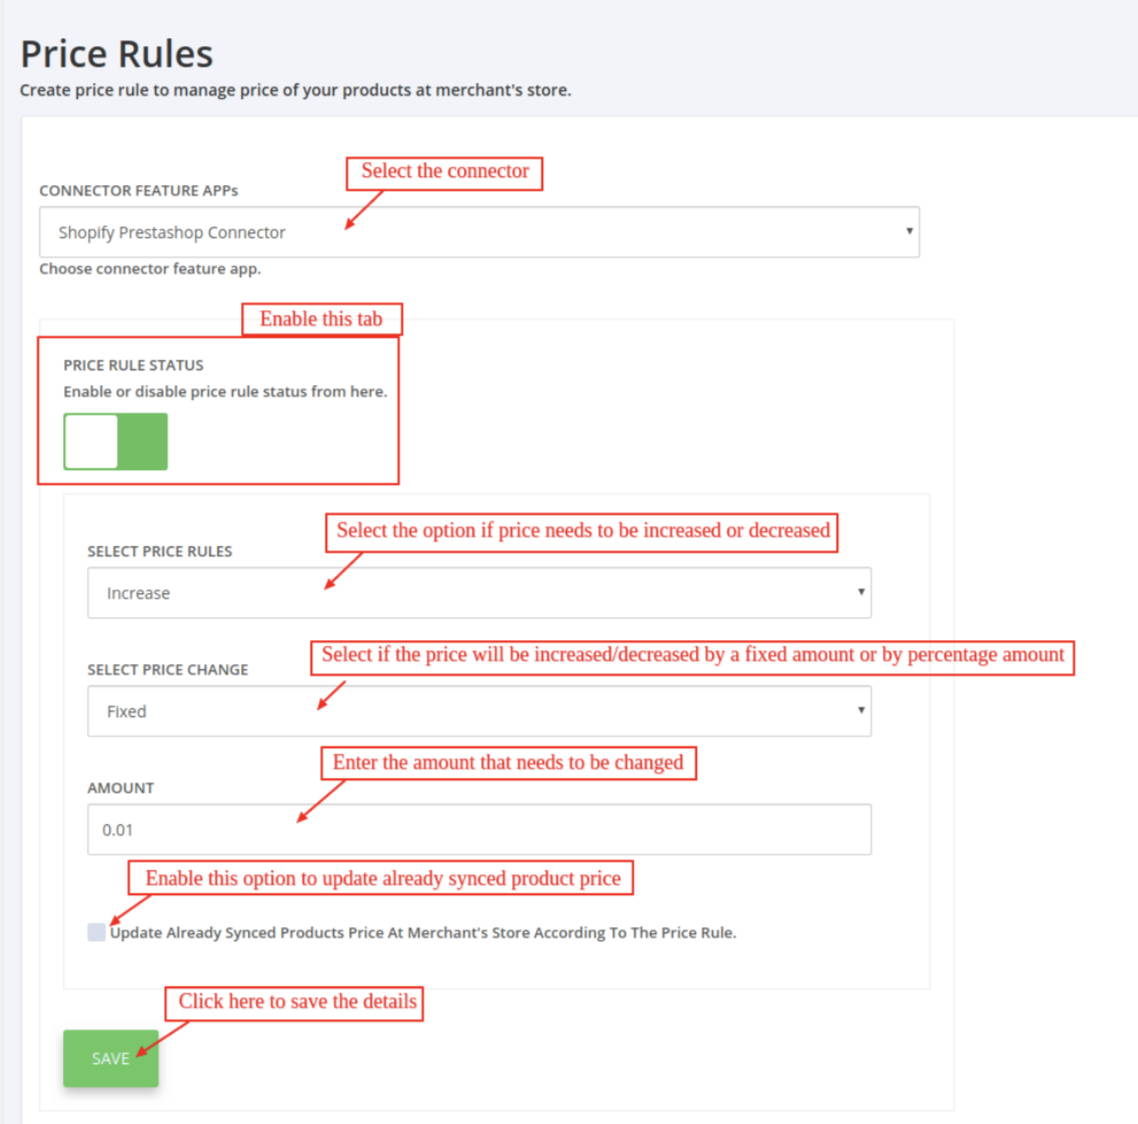
STEP #10: Price Rule
- Click On "Configuration" Tab
- >>Price Adjustments
- >>Choose your connector "Woo Commerce"
- Enable "Price Rule Status"
Prices will update automatically. Please standby while TWM Reviews your account
Thank you for being part of the Economic Engine for Women.
In the interim, make TheWMarketplace your #1 e-commerce place to find products and services.
Shop from the very women on the site. It is a woman, just like you, looking forward to that sale.
Don't forget to drop them a note and share your TWM storefront.
OUR MISSION
To close the economic gender gap by empowering women entrepreneurs to grow and thrive while providing a destination for consumers to shop their values.